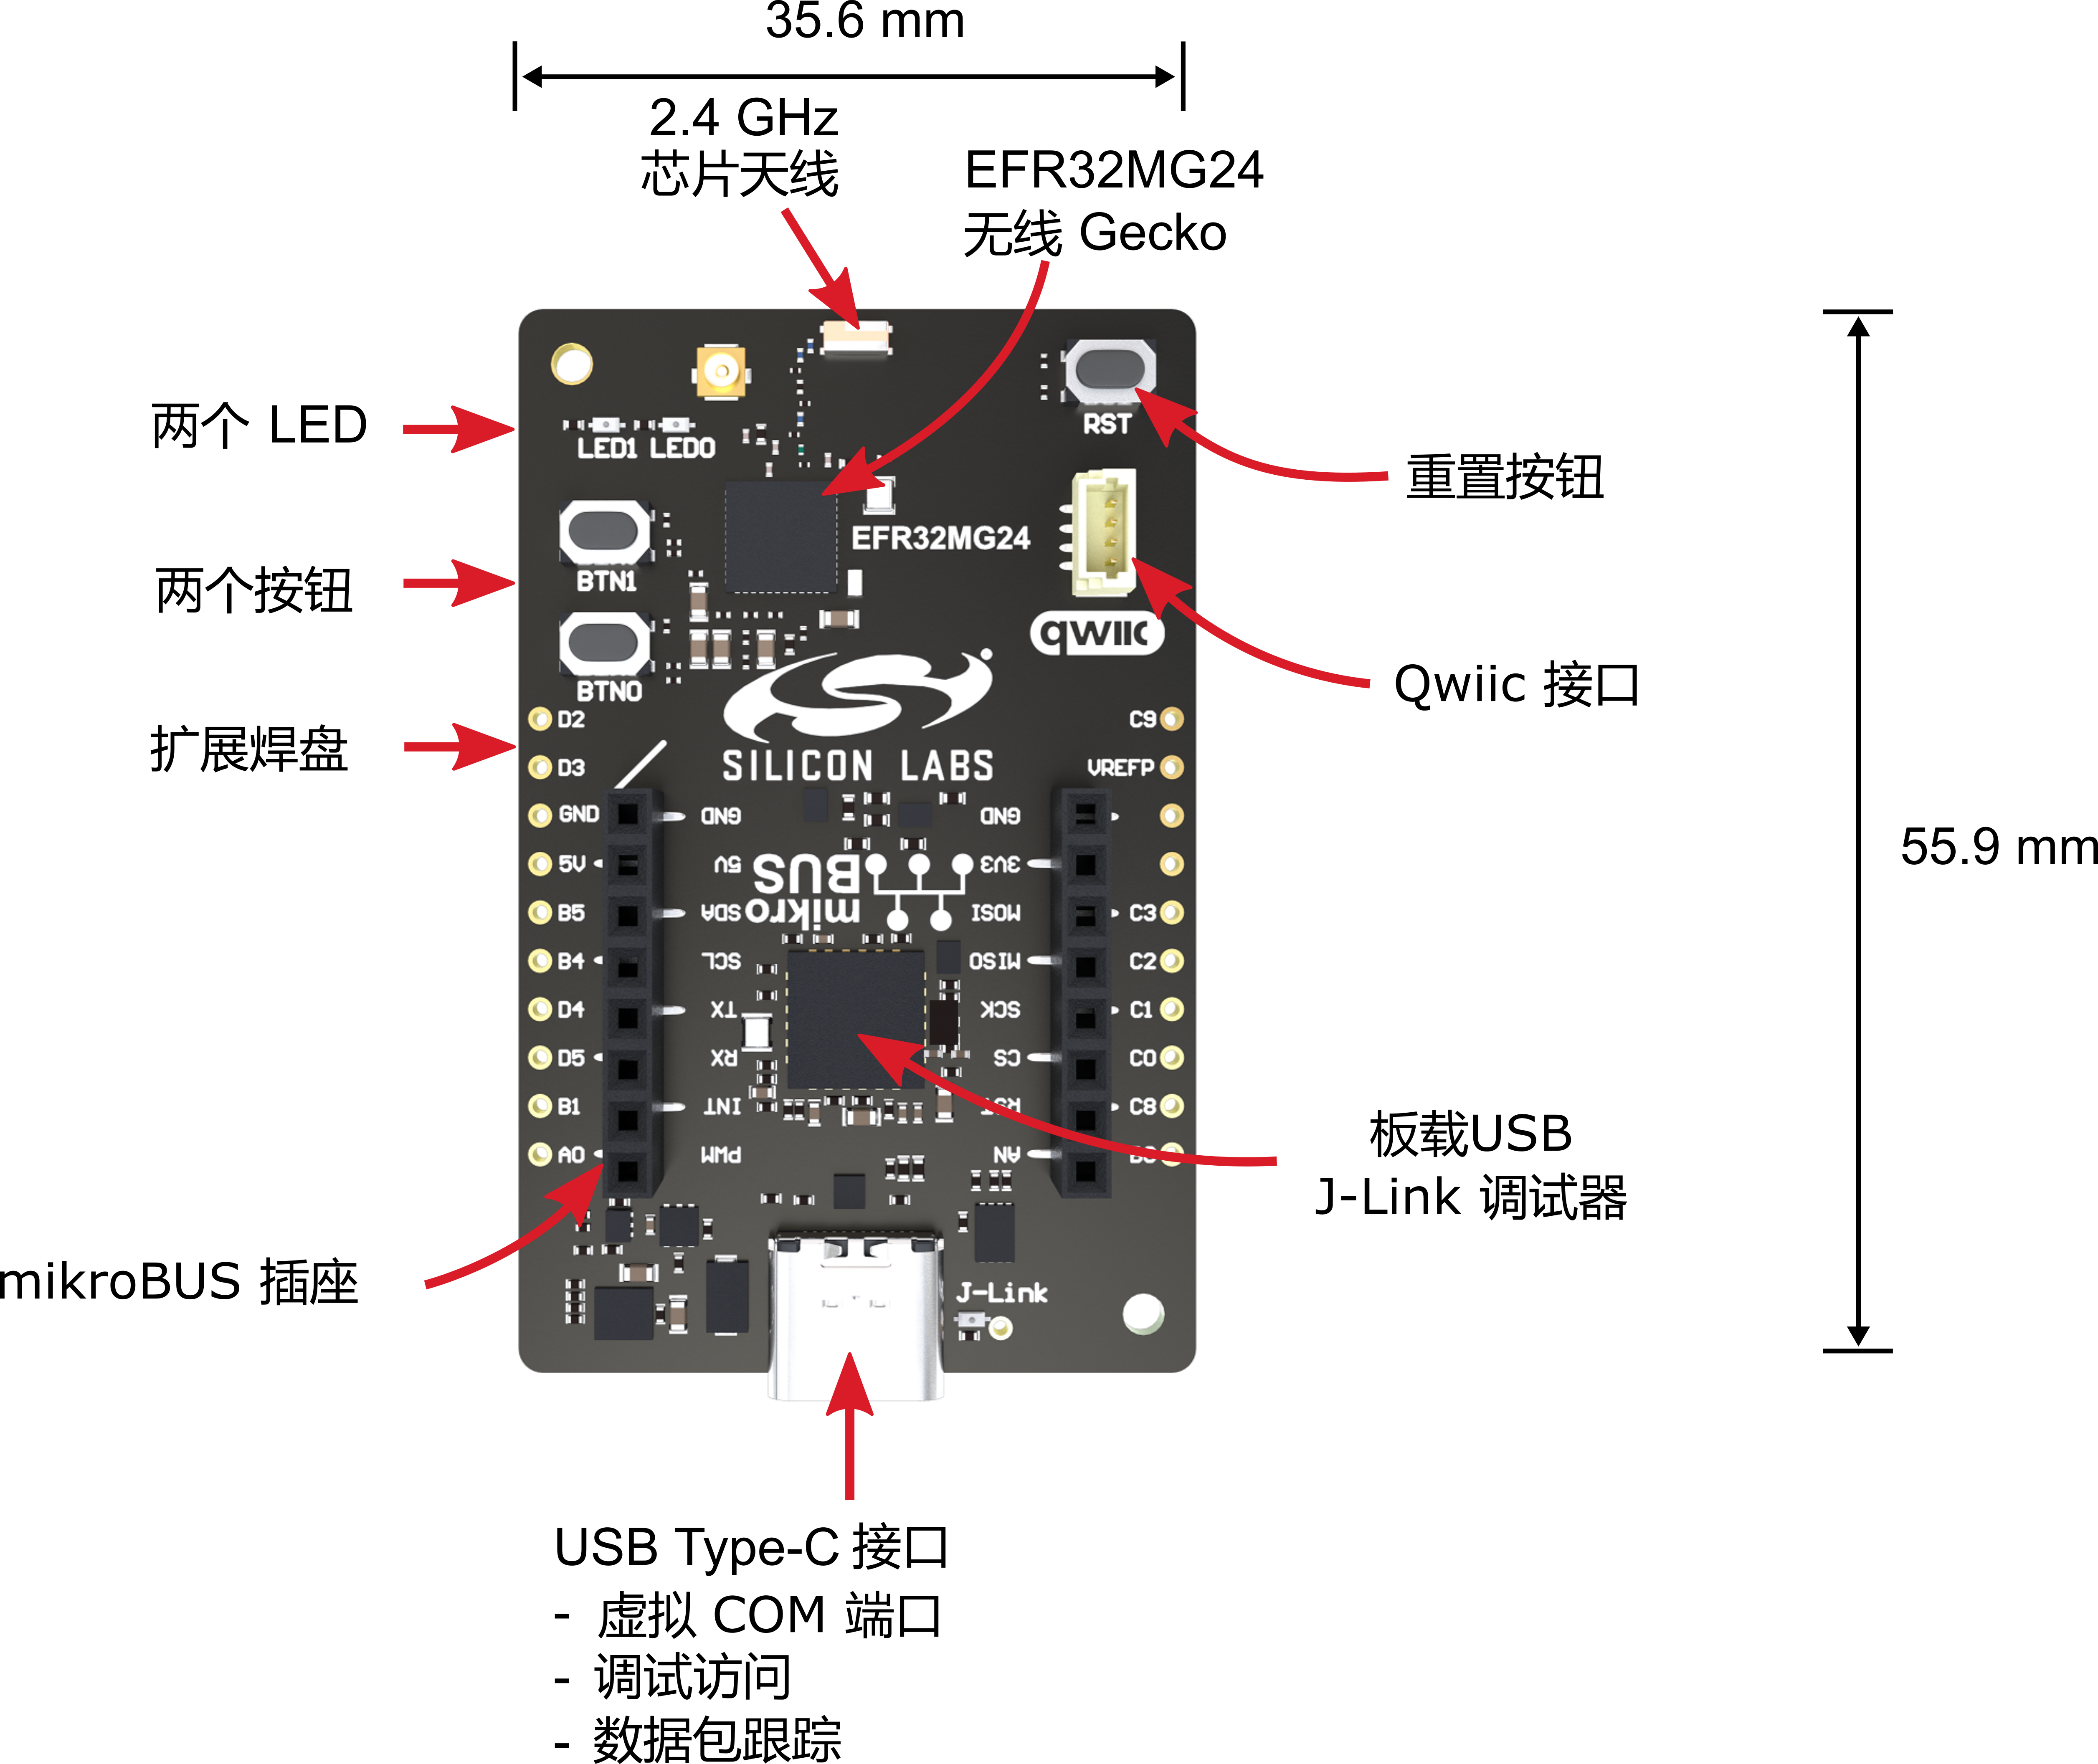
开发板介绍
XG24-EK2703A是一款基于EFR32MG24片上系统的开发套件,具备超低成本、低功耗和小巧的特点。该套件支持2.4GHz无线通信,兼容蓝牙LE、蓝牙mesh、Zigbee、Thread和Matter协议,为无线物联网产品的开发和原型制作提供了极大的便利。
套件特性:
- 一个USB接口
- 一个板载SEGGER J-Link 调试器,支持SWD
- 两个LED和两个按钮
- 虚拟COM端口
- 数据包跟踪接口(PTI)
- 一个支持外部硬件连接的mikroBus插座和一个Qwiic连接器
- 32 位 ARM Cortex-M33,78 MHz最高工作频率
- 1536 kB 闪存和 256 kB RAM

环境搭建
安装Simplicity Studio Version 5
下载并安装Simplicity Studio版本5 ,插入开发板 进行自动识别,安装相关依赖
下载地址:https://www.silabs.com/development-tools/wireless/efr32xg24-explorer-kit?tab=getting-started
更新python支持固件
先通过链接下载固件,然后要将固件文件刷入板上,需要使用Simplicity Commander。
通过Simplicity Studio安装Simplicity Commander。
要使用Simplicity Commander将固件刷入xG24套件,按照以下简单步骤操作:
- 将开发板连接到电脑,并确保它被识别。
- 浏览并选择你想上传到板上的固件文件。
- 启动烧录过程,将固件上传到开发板。
相关链接:
https://circuitpython.org/board/silabs_explorerkit_xg24_brd2703a/
https://github.com/SiliconLabs/circuitpython_applications/blob/main/doc/running_circuitpython.md
安装Tonny
Thonny 是目前最简单 最流行的python 上位机IDE 如下图。

参考链接 https://thonny.org/
验证效果
如能正常执行python print("Hello ") 则表示目前环境OK。
好了 到此为止,目前板子可以完美支持用python开发,基于Tonny IDE进行开发。接下来,转到我们具体的任务开发。
任务描述
- 使用芯片内部的温度检测外设,
- 测量温度并通过蓝牙发送至上位机,
- 在上位机中以“绘图”的形式对温度数据进行可视化。
任务分析
整个系统分成4个大模块
- 数据采集:获取芯片的内部温度
- 蓝牙发送(开发板):蓝牙通道建立,并将温度数据通过GATT发送出去
- 蓝牙接收(上位机):蓝牙通道建立,并将温度数据通过GATT接受
- 数据显示:收到的温度数据进行数据可视化。
整个流程图如下所示
首先开发板端,开启蓝牙广播,并采集温度数据,待蓝牙建立连接后,将数据发送出去。
上位机端,此处是PC端,通过本地的蓝牙建立蓝牙通道,然后接收到温度数据。
并且,在本地建立HTTP服务器,建立网页可视化模板。
最后,把接收到的温度数据进行可视化展示。
核心代码
- 数据采集:获取芯片的内部温度
import microcontroller
print(microcontroller.cpu.temperature)  // 得到温度数据
- 蓝牙发送(开发板):蓝牙通道建立,并将温度数据通过GATT发送出去
while True:
    # Advertise when not connected.
    ble.start_advertising(advertisement)
    print("ble adv start:")
    while not ble.connected:
        pass
    ble.stop_advertising()
    print("ble adv stop:")

    while ble.connected:
        print("ble connect:")
        print(microcontroller.cpu.temperature)
        uart_server.write("Temp:{}".format(microcontroller.cpu.temperature))  // 发送温度数据
        time.sleep(0.1)
- 蓝牙接收(上位机):蓝牙通道建立,并将温度数据通过GATT接受
async def parse_temperature(data: bytearray):
    match = re.search(r'Temp:(-?\d+\.?\d*)', data.decode())
    if match:
        temperature = float(match.group(1))
        temperature_data.append(temperature)
        print(f"Temperature: {temperature}°C")
        return temperature
    return None

async def handle_rx(_: BleakGATTCharacteristic, data: bytearray):
    temperature = await parse_temperature(data)
    if temperature is not None:
        for ws in websockets:
            await ws.send_str(json.dumps({'temperature': temperature}))


async def uart_terminal():
    device = await BleakScanner.find_device_by_filter(lambda device, advertisement_data: UART_SERVICE_UUID.lower() in advertisement_data.service_uuids)
    if device is None:
        print("No matching device found.")
        return

    async with BleakClient(device) as client:
        await client.start_notify(UART_TX_CHAR_UUID, handle_rx)
        print("Connected, start typing and press ENTER...")
        await asyncio.Future()  # 保持连接直到异步任务被取消
- 数据可视化:建立HTTP服务器,收到的温度数据进行数据可视化。
async def start_server():
    app = web.Application()
    app.add_routes([
        web.get('/', index),
        web.get('/ws', websocket_handler)
    ])
    runner = web.AppRunner(app)
    await runner.setup()
    site = web.TCPSite(runner, 'localhost', 8080)
    await site.start()
    print("Server started at http://localhost:8080")
    <script>
        document.addEventListener('DOMContentLoaded', function() {
            var ws = new WebSocket('ws://' + window.location.host + '/ws');
            var temperatureData = [];
            var averageData = [];
            var labels = [];
            var config = {
                type: 'line',
                data: {
                    labels: labels,
                    datasets: [{
                        label: 'Real-time Temperature',
                        backgroundColor: 'rgb(255, 99, 132)',
                        borderColor: 'rgb(255, 99, 132)',
                        data: temperatureData,
                        fill: false,
                    }, {
                        label: 'Average Temperature',
                        fill: false,
                        backgroundColor: 'rgb(54, 162, 235)',
                        borderColor: 'rgb(54, 162, 235)',
                        data: averageData,
                    }]
                },
                options: {
                    scales: {
                        x: {
                            // Removed 'type': 'linear' for simplicity
                        },
                        y: {
                            beginAtZero: false,
                            suggestedMin: 15, // Adjust based on your data range
                            suggestedMax: 30, // Adjust based on your data range
                        }
                    }
                }
            };
功能展示
- 可视化展示
2, 开发板端的数据采集
心得体会
非常感谢本次活动 。这次除了常规的BLE使用以外,对HTTP本地的建立,可视化展示做了大量尝试。对未知领域又进一步,非常有成就感。
期待以后更多更有意思的活动。